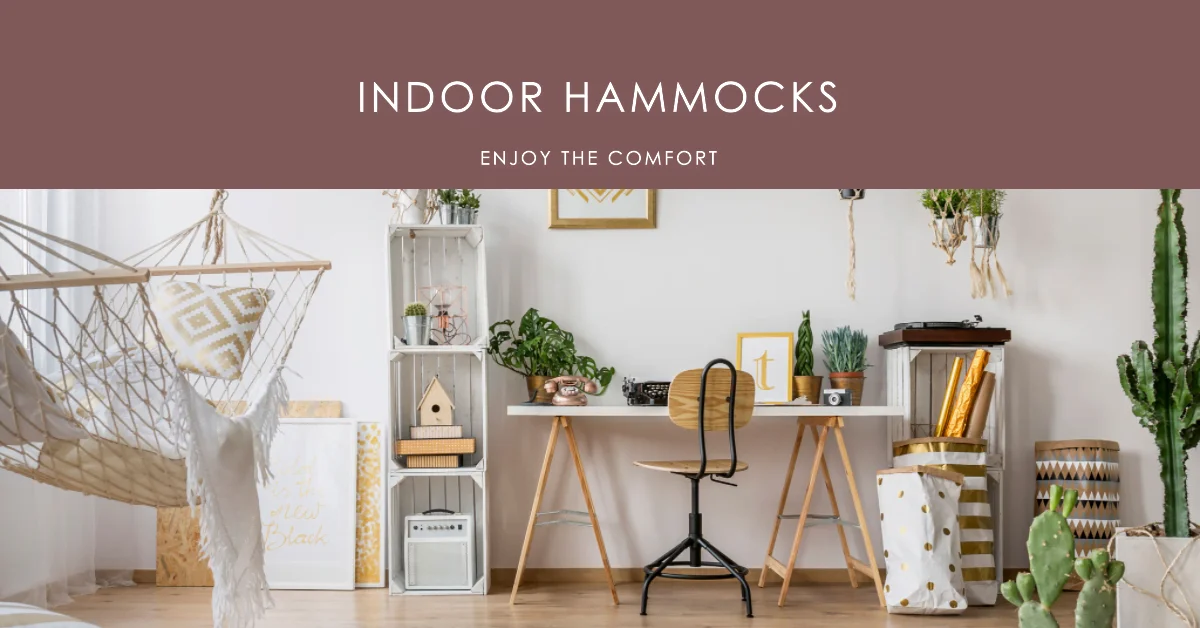

The Ultimate Guide to Indoor Hammocks for a Cozy and Chic Home

The Ultimate Guide to Indoor Hammocks for a Cozy and Chic Home

By Inside Decors · Updated January 16, 2026

Affiliate Disclosure: This article contains affiliate links. If you make a purchase through these links, we may earn a small commission at no extra cost to you. We only recommend products we believe will add value to your home.

Indoor hammocks have evolved from vacation novelties into sophisticated design elements that deliver genuine comfort and style. After installing and testing various hammock styles in residential spaces over the past several years, I’ve learned that the right indoor hammock can transform an underutilized corner into your favorite retreat—but only if you choose wisely and install it correctly.

This guide draws on hands-on experience with rope, fabric, and chair-style hammocks across different room types, budgets ranging from $40 to $400, and installation methods from ceiling hooks to freestanding frames. You’ll learn which hammock type suits your space, how to install it safely, and what to expect in terms of comfort and maintenance.

Key Takeaways

  • Space requirements: Traditional hammocks need 10-13 feet of linear space; hammock chairs work in areas as small as 4×4 feet
  • Weight capacity matters: Most quality indoor hammocks support 250-450 lbs; always verify before purchase
  • Installation is critical: Proper ceiling joist mounting or a sturdy stand is non-negotiable for safety
  • Material affects comfort: Cotton offers breathability, polyester provides durability, and parachute nylon balances both
  • Budget range: Expect $40-$100 for basic models, $150-$250 for premium fabric hammocks, $200-$400 for quality stands
  • Maintenance is minimal: Most require only occasional washing and annual hardware inspection

Understanding Indoor Hammock Types: Real-World Performance

Understanding Indoor Hammock Types: Real-World Performance

Choosing the right hammock style determines whether it becomes a daily sanctuary or an awkward decoration. Here’s what I’ve learned from actual use.

Traditional Rope Hammocks

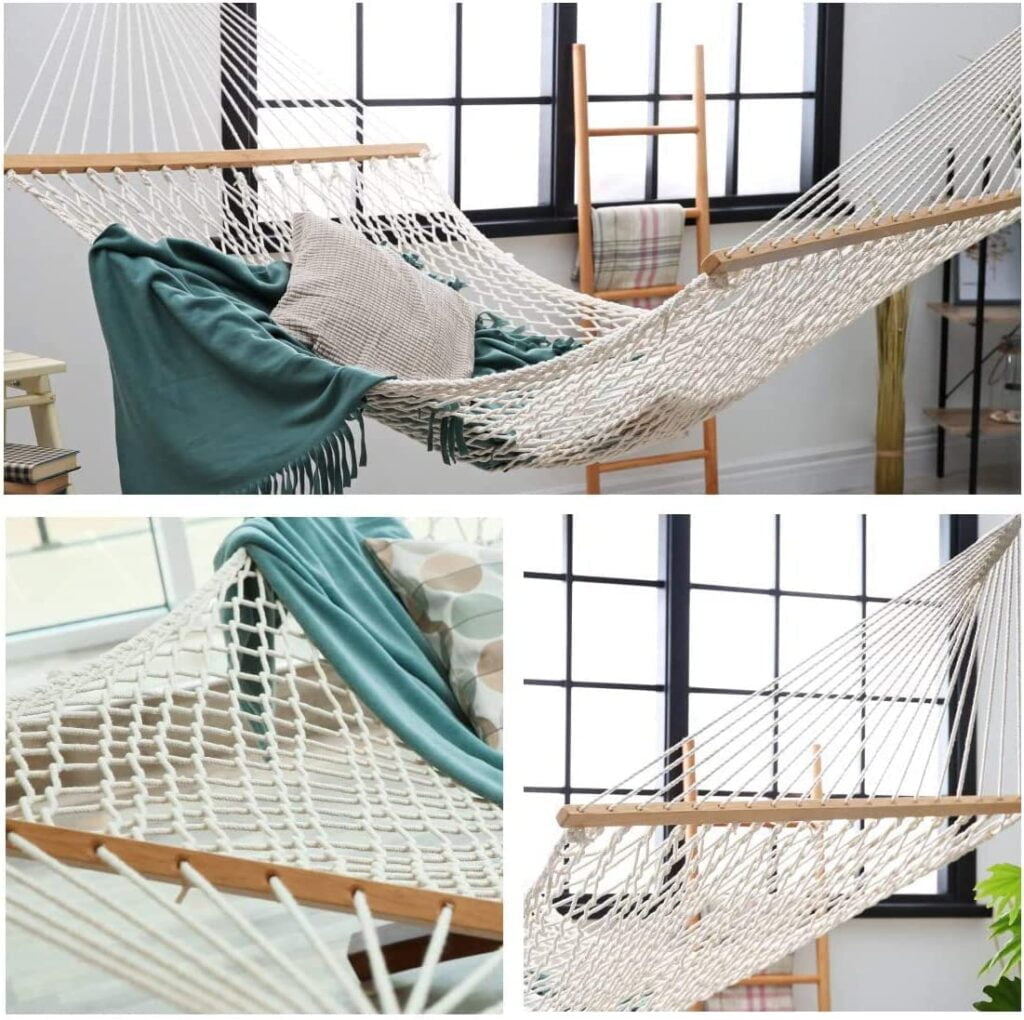
Classic rope hammocks feature thick cotton or polyester cords woven into a net pattern with wooden spreader bars at each end. I installed a cotton rope hammock in a sunroom with 12-foot ceilings, and while it looks stunning, there’s a learning curve.

Pros:
– Excellent breathability—ideal for warm climates or rooms without AC
– Distinctive aesthetic that works with boho living room decor and coastal styles
– Rope patterns create interesting shadow play in natural light
– Generally affordable ($50-$120)

Cons:
– Rope leaves temporary impressions on skin during extended use
– Requires 10-13 feet of space due to spreader bars
– Less supportive for side sleepers
– Cotton rope can mildew in humid environments

Best for: Reading nooks in well-ventilated spaces, covered patios, or anyone who prioritizes traditional aesthetics and doesn’t mind the rope texture.

Fabric Hammocks (Brazilian/Mayan Style)

Fabric hammocks use woven cotton, polyester, or nylon without spreader bars, creating a cocoon-like wrap. I’ve used a double-layer Brazilian cotton hammock in a bedroom corner for two years, and it’s become my preferred reading spot.

Pros:
– Enveloping comfort—the fabric conforms to your body
– Supports side sleeping and various positions
– Compact when not in use (can be gathered to one side)
– Available in vibrant patterns that complement various interior design styles
– Better weight distribution reduces pressure points

Cons:
– Less breathable than rope (though still comfortable)
– Can feel restrictive if you prefer open, flat lying
– Quality varies significantly by weave density
– Premium models cost $120-$250

Best for: Bedrooms, meditation spaces, or anyone prioritizing comfort over aesthetics. Excellent for people who want to curl up with a book or take actual naps.

Hammock Chairs (Hanging Chairs)

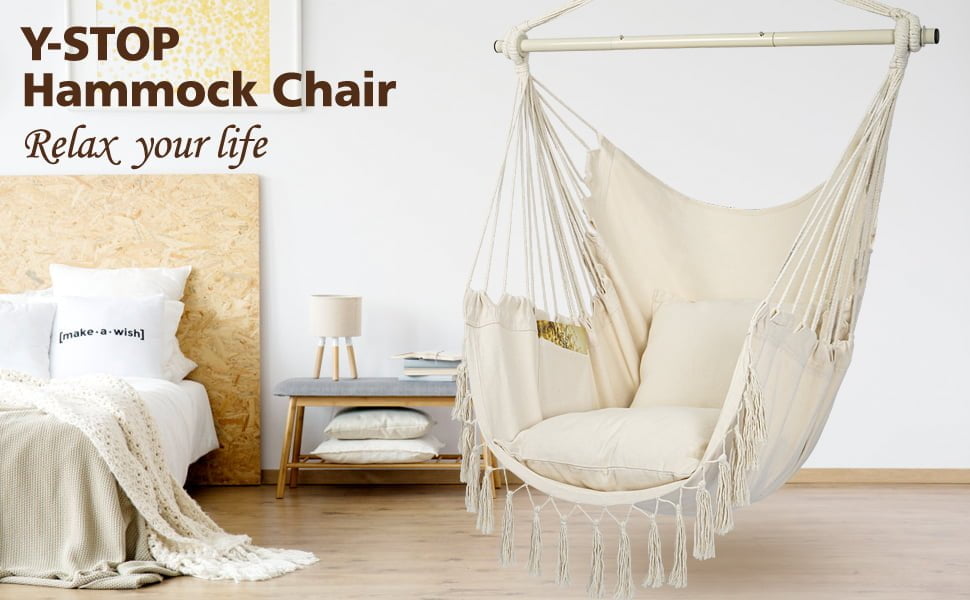
Hammock chairs hang from a single point and provide a seated or reclined position. I installed one in a home office corner where a full hammock wouldn’t fit, and it’s perfect for 20-minute breaks.

Pros:
– Minimal space requirement (4×4 feet floor space)
– Easier installation with single mounting point
– Gentle swaying motion aids focus and stress relief
– Works in apartments and smaller rooms
– Price range: $40-$150

Cons:
– Not suitable for lying flat or sleeping
– Weight capacity typically lower (200-300 lbs)
– Can feel cramped for larger individuals
– Some models lack adequate back support

Best for: Small apartments, offices, kids’ rooms, or reading corners where floor space is limited. Ideal for sitting meditation or casual relaxation rather than napping.

Hammock Comparison: Finding Your Match

Hammock Comparison: Finding Your Match
Hammock TypeSpace NeededWeight CapacityComfort LevelPrice RangeBest Use Case
Rope (Cotton)10-13 ft300-450 lbsModerate$50-$120Sunrooms, covered patios, boho spaces
Rope (Polyester)10-13 ft350-500 lbsModerate$60-$140High-humidity areas, outdoor-indoor transition
Brazilian Fabric9-12 ft300-400 lbsHigh$80-$200Bedrooms, reading nooks, meditation spaces
Mayan Fabric9-12 ft250-350 lbsHigh$70-$180Living rooms, guest rooms, bohemian interiors
Parachute Nylon9-12 ft400-500 lbsModerate-High$50-$100Multi-purpose, easy maintenance
Hammock Chair4×4 ft200-300 lbsModerate$40-$150Offices, small apartments, kids’ rooms

Critical Factors for Selecting Your Indoor Hammock

Critical Factors for Selecting Your Indoor Hammock

Size and Space Requirements

Measure twice, buy once. I made the mistake of ordering a 13-foot hammock for a room with only 11 feet of clearance—it arrived back in its box the same day.

For traditional hammocks: You need the hammock length plus 2-3 feet. A 10-foot hammock requires roughly 12-13 feet of wall-to-wall or mounting point distance. Ceiling height should be at least 8 feet, ideally 9-10 feet for comfortable hanging angles.

For hammock chairs: Measure from your ceiling to 18 inches above the floor. Most chairs need 6-7 feet of vertical clearance and about 4 feet of swing radius.

Pro tip: Use painter’s tape to mark the hammock’s footprint on your floor and walls before purchasing. Sit in the space and visualize the swing arc—you’ll quickly see if it works.

Weight Capacity: Don’t Skimp on Safety

Weight capacity isn’t just about the hammock fabric—it’s about the entire system: fabric, suspension ropes, carabiners, ceiling hooks, and joist strength.

Most quality hammocks support 250-450 lbs, but I always recommend:
– Single user: Minimum 300 lbs capacity
– Two adults: Minimum 450 lbs capacity
– Add 100 lbs buffer for dynamic loading (the force when you plop down)

I tested a budget hammock rated for 250 lbs (I weigh 180), and while it held, the suspension ropes showed concerning stretch after just two weeks. Upgraded to a 400-lb model, and it’s been rock-solid for two years.

Material: Balancing Comfort, Durability, and Maintenance

Cotton: Soft, breathable, and comfortable but requires more maintenance. Absorbs moisture and can mildew in humid climates. Best for climate-controlled indoor spaces. Expect 3-5 years with proper care.

Polyester: Weather-resistant, quick-drying, and durable but less breathable. Slightly stiffer texture than cotton. Excellent for high-humidity areas or spaces that transition between indoor and outdoor. Lifespan: 5-7 years.

Parachute Nylon: Lightweight, incredibly strong, and easy to clean. Less traditional aesthetic but highly practical. Popular for modern and minimalist interiors. Can last 7-10 years.

Blends: Cotton-polyester blends attempt to balance comfort and durability. Results vary by ratio—look for at least 60% cotton for comfort.

Style and Design Integration

Indoor hammocks make bold statements. I’ve seen them work beautifully and clash terribly, and the difference comes down to intentional design integration.

For bohemian and eclectic spaces: Colorful Mayan hammocks with fringe details complement layered textiles, macramé, and natural materials. Pair with throw pillows in coordinating patterns.

For modern and minimalist rooms: Choose solid colors in neutral tones (cream, gray, charcoal) or parachute nylon in muted shades. Sleek metal stands work better than rope suspension.

For coastal and nautical themes: White or navy rope hammocks with wooden spreader bars reinforce the aesthetic. Position near windows with natural light.

For transitional and traditional spaces: This is trickier. Hammock chairs in leather or neutral fabrics integrate more easily than full hammocks. Position in libraries, sunrooms, or private spaces rather than formal living areas.

Consider the hammock as you would a statement piece in the 60/30/10 decorating rule—it can serve as your 10% accent if the room’s foundation is established.

Installation: The Make-or-Break Factor

Poor installation ruins even the best hammock. I’ve seen ceiling hooks pull out of drywall, stands tip over, and hammocks hung at uncomfortable angles. Here’s what actually works.

Finding the Right Location

Ceiling-mounted hammocks:
– Locate ceiling joists with a stud finder (joists are typically 16 or 24 inches apart)
– Avoid areas directly under plumbing or HVAC
– Ensure 3-4 feet of clearance from walls and furniture for swing arc
– Consider sight lines—you’ll see the hammock from multiple rooms

Freestanding hammock stands:
– Require 10-15 feet of floor space (length varies by model)
– Work on any floor type but may scratch hardwood without pads
– Easier to relocate but take up more visual space
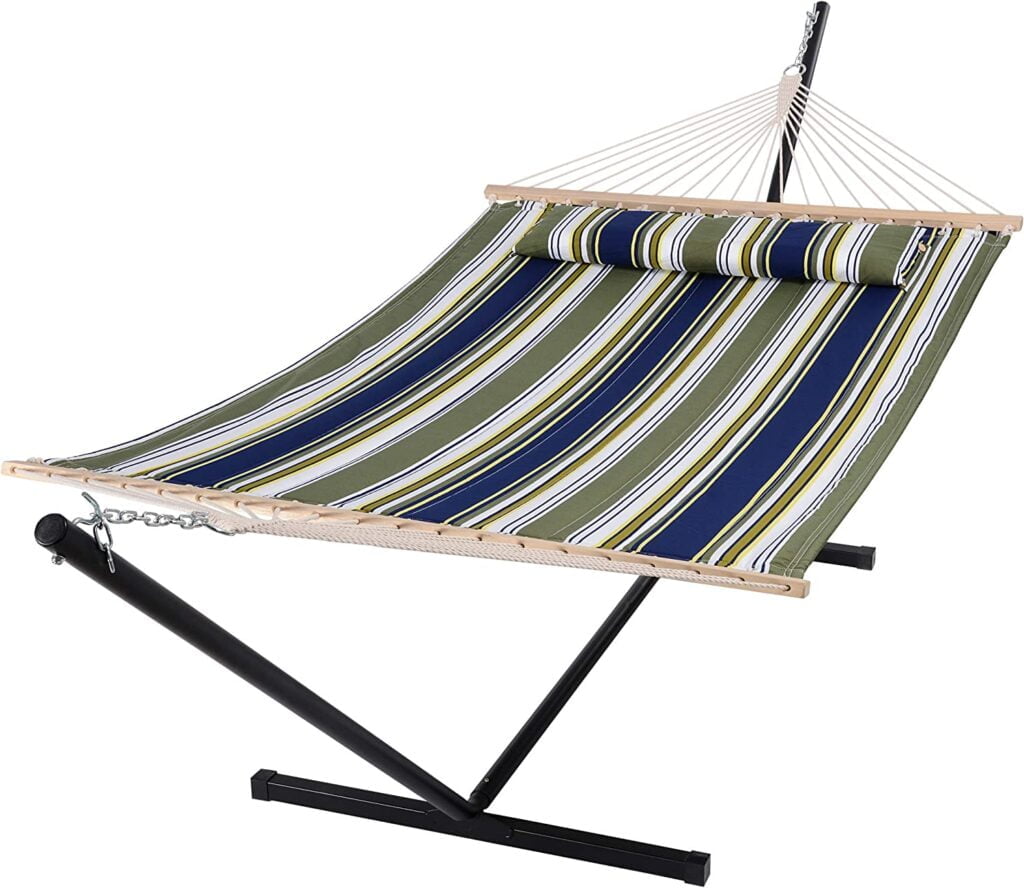
– Quality stands cost $150-$400 but eliminate installation concerns

I initially mounted a hammock in a bedroom corner that seemed perfect—until I realized the swing arc put me inches from a dresser. Moved it 3 feet over, and the experience improved dramatically.

Hardware and Installation Methods

For ceiling joists (the gold standard):
1. Use 3/8-inch or 1/2-inch eye bolts, minimum 3 inches long
2. Drill pilot holes slightly smaller than the bolt diameter
3. Screw eye bolts directly into joists (not just drywall)
4. Use heavy-duty carabiners (rated for climbing) to attach hammock
5. Test with 1.5x your expected weight before use

For concrete ceilings:
– Use concrete anchors rated for 500+ lbs
– Requires hammer drill and masonry bits
– Consider professional installation if you’re not experienced

For drywall-only situations:
– Toggle bolts can work for hammock chairs (single point, lower weight)
– NOT recommended for full hammocks
– Freestanding stand is the safer alternative

Hammock stands:
Search for quality options like hammock stands on Amazon. Look for powder-coated steel construction, weight capacity matching your hammock, and rubber feet to protect floors.

Getting the Angle Right

Hammock comfort depends heavily on hanging angle. The ideal setup creates a 30-degree angle from horizontal when the hammock is weighted.

Too tight (less than 20 degrees): Uncomfortable, feels like you’re in a banana, difficult to get in and out.

Too loose (more than 40 degrees): Unstable, tips you to one side, defeats the purpose.

The 30-degree sweet spot: Comfortable for extended periods, easy to adjust position, stable.

I use adjustable tree straps (yes, indoors) because they let me fine-tune the height and angle without reinstalling hardware. After two years, I’ve adjusted my bedroom hammock three times as I’ve learned my preferences.

Safety Precautions

  • Inspect all hardware every 3-4 months for wear, rust, or loosening
  • Never exceed weight capacity
  • Teach children proper entry/exit techniques (no jumping)
  • Keep the area beneath clear of hard objects
  • Consider placing a rug or mat underneath for comfort and floor protection
  • If you hear creaking or see ceiling flexing, stop use immediately and reassess installation

Maintenance and Care: Extending Hammock Life

Proper maintenance has kept my hammocks looking and functioning like new for years. Here’s the realistic care routine.

Cleaning Different Materials

Cotton hammocks:
– Hand wash in cold water with mild detergent every 4-6 weeks (more if used daily)
– Machine wash on gentle cycle in a mesh bag if manufacturer approves
– Air dry completely—never put in dryer (causes shrinkage and weakening)
– Spot clean spills immediately to prevent staining

Polyester and nylon:
– Machine wash on gentle cycle every 6-8 weeks
– Use cold water and mild detergent
– Can tumble dry on low, but air drying extends life
– More resistant to stains and mildew

Rope hammocks:
– Shake out debris weekly
– Hand wash or hose down every 4-6 weeks
– Hang to dry completely before storage
– Check for fraying at connection points

I keep a spray bottle with fabric refresher nearby for quick freshening between washes.

Storage Recommendations

If you’re storing your hammock seasonally or during moves:

  1. Clean and dry completely (any moisture causes mildew)
  2. Loosely coil or fold—avoid tight compression
  3. Store in breathable cotton bag (not plastic)
  4. Keep in cool, dry location away from direct sunlight
  5. Add cedar blocks or lavender sachets to deter pests

My year-round hammocks stay installed, but I rotate them every few months to prevent uneven wear patterns.

Inspection and Repair

Every 3-4 months, perform this 5-minute inspection:

  • Fabric: Look for thinning areas, holes, or fraying edges
  • Ropes/straps: Check for wear, especially where they contact carabiners
  • Hardware: Ensure eye bolts haven’t loosened, carabiners open/close smoothly
  • Ceiling: Look for cracks, sagging, or other stress signs around mounting points

Small frays can be trimmed and sealed with fabric glue. Significant damage requires replacement—don’t risk safety for a $100 hammock.

Styling Your Space Around an Indoor Hammock

A hammock shouldn’t exist in isolation—it’s part of your room’s ecosystem. Here’s how to create cohesive, functional spaces.

Creating a Relaxation Zone

I’ve found that hammocks work best when they’re part of a dedicated relaxation area rather than randomly placed. Consider adding:

  • Side table or small shelf: Within arm’s reach for books, drinks, phone (search for small side tables)
  • Lighting: Floor lamp or pendant light for reading without overhead glare
  • Textiles: Soft throw blanket for cooler evenings, complementary pillows for lumbar support
  • Plants: Hanging or floor plants create a natural, calming environment
  • Sound: Small Bluetooth speaker or white noise machine

This transforms a hammock from a novelty into a functional retreat you’ll actually use daily.

Complementary Decor Elements

The hammock’s style should echo in surrounding elements:

For rope hammocks:
– Natural fiber rugs (jute, sisal)
– Wooden furniture and accents
– Woven baskets for storage
– Neutral color palette with ocean blues or earth tones

For colorful fabric hammocks:
– Pick up accent colors in artwork, pillows, or throws
– Balance bold hammock with neutral walls and furniture
– Add texture through macramé, woven wall hangings, or tapestries
– Consider the hammock your statement piece

For modern hammock chairs:
– Sleek metal or acrylic side tables
– Minimalist artwork
– Solid-color textiles
– Clean lines in surrounding furniture

Room-Specific Considerations

Bedrooms: Position away from the bed to create a distinct relaxation zone. Works beautifully in master suites with sitting areas or large guest rooms. Ensure it doesn’t block closet access or create traffic flow issues.

Living rooms: Best in open-concept spaces or rooms with defined zones. Can replace a traditional reading chair. Consider sight lines from dining areas and entries—you want it to feel intentional, not random.

Home offices: Hammock chairs work better than full hammocks. Position for 20-minute breaks without requiring full room reorganization. Helps separate “work mode” from “break mode” psychologically.

Sunrooms and enclosed porches: Ideal locations with natural light and ventilation. Rope hammocks excel here. Add weather-resistant throw pillows for comfort.

Kids’ rooms: Hammock chairs are safer and more practical than full hammocks. Ensure proper weight capacity as children grow. Creates a cozy reading nook that encourages independent quiet time.

Budget Considerations and Value

Indoor hammocks span a wide price range, and understanding where your money goes helps you invest wisely.

Budget Tier ($40-$100)

Expect basic cotton or polyester hammocks, simple rope designs, or entry-level hammock chairs. These work fine for occasional use or testing whether you’ll actually use a hammock before investing more.

Pros: Low commitment, good for kids’ rooms or seasonal use
Cons: Lower weight capacity, less durable materials, may lack comfort features

Mid-Range ($100-$250)

This sweet spot offers quality Brazilian or Mayan hammocks, durable rope models, and comfortable hammock chairs with better support. Most of my recommendations fall here.

Pros: Noticeable quality improvement, better materials, longer lifespan (5-7 years)
Cons: Still may need separate stand purchase

Premium ($250-$400+)

High-end hammocks feature superior materials, hand-woven construction, and often include stands or premium hardware. Quilted hammocks with padding fall in this range.

Pros: Maximum comfort and durability, often heirloom quality
Cons: Significant investment, may be overkill for casual users

Stands vs. Ceiling Installation

Freestanding stands: $150-$400 for quality models
– No installation required
– Portable and adjustable
– Takes up floor space
– Visible from all angles

Ceiling installation: $20-$50 for hardware
– Cleaner aesthetic
– Permanent (or semi-permanent)
– Requires proper joists
– Professional installation adds $100-$200

I started with a stand to test the concept, then installed ceiling mounts once I knew I’d use it daily. The stand now lives in my guest room.

Common Mistakes to Avoid

After helping friends install hammocks and making my own errors, here are the pitfalls to sidestep:

  1. Underestimating space requirements: That 10-foot hammock needs 13 feet of actual space. Measure generously.

  2. Skimping on hardware: Using drywall anchors instead of joists, or cheap carabiners that aren’t rated for the weight. This is where injuries happen.

  3. Ignoring the swing arc: Positioning too close to walls, furniture, or windows. You need clearance.

  4. Choosing style over comfort: A beautiful hammock you never use because it’s uncomfortable is wasted money.

  5. Improper hanging angle: Too tight or too loose ruins the experience. Take time to adjust.

  6. Neglecting maintenance: Mildew, fraying, and hardware failure are preventable with basic care.

  7. Forgetting about getting in and out: Some hammocks are tricky to enter gracefully. Test before committing if possible.

Making Your Home Feel Complete

An indoor hammock represents more than furniture—it’s a commitment to rest and intentional relaxation in your home. When integrated thoughtfully, it becomes a space you gravitate toward naturally, whether for morning coffee, afternoon reading, or evening meditation.

The key is matching the hammock type to your actual use case, installing it properly (safety first), and creating a surrounding environment that invites use. A hammock in an empty corner with harsh overhead lighting won’t get used. A hammock in a cozy nook with soft lighting, a side table, and a throw blanket becomes a daily sanctuary.

For more ideas on making your home feel inviting and complete, consider how each element—from hammocks to lighting to textiles—contributes to the overall atmosphere you’re creating.

Shop This Look

Editor-picked finds to bring this style home:

As an Amazon Associate we earn from qualifying purchases.

Frequently Asked Questions

Can you really sleep in an indoor hammock overnight?

Yes, many people sleep in hammocks nightly, though it requires adjustment. Brazilian-style fabric hammocks work best for sleeping because they allow diagonal positioning, which creates a flatter sleeping surface. Start with naps before committing to overnight sleep. Side sleepers generally adapt more easily than back sleepers. Expect a 1-2 week adjustment period as your body acclimates. Use a pillow for neck support and consider a light blanket even in warm weather, as hammocks can create a cooling effect.

How much weight can ceiling joists support for hammock installation?

Standard ceiling joists (2×6 or larger) can typically support 300-500 lbs when properly mounted, but this depends on joist spacing, wood condition, and span. Always mount into the joist itself (not just drywall) using appropriate hardware. For hammocks, use 3/8-inch or 1/2-inch eye bolts screwed at least 2.5 inches into solid wood. If you’re uncertain about your ceiling’s capacity, consult a contractor or structural engineer—especially in older homes or if you plan to use the hammock for two people.

What’s the difference between a hammock chair and a hanging egg chair?

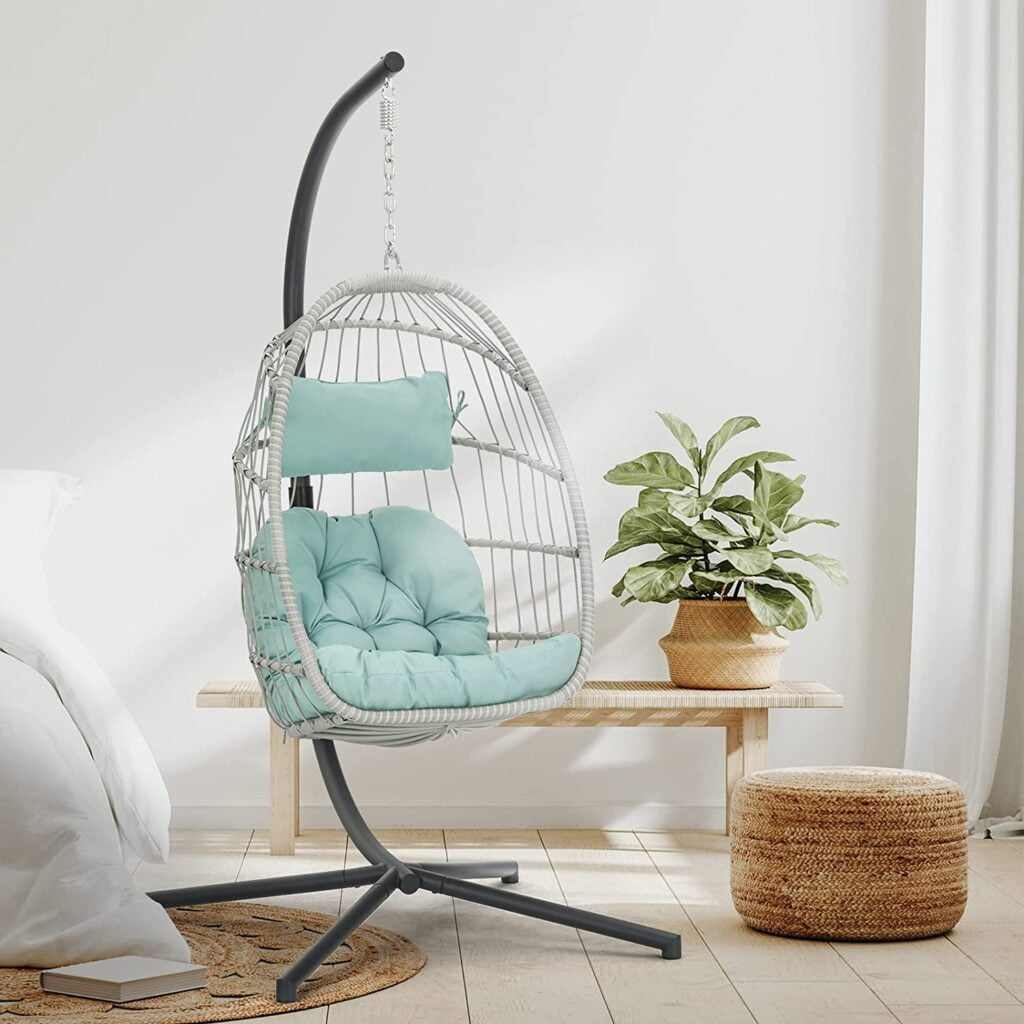
Hammock chairs use fabric or rope suspended from a single point and conform to your body, creating a cocoon-like feel. Hanging egg chairs have rigid frames (usually rattan or metal) that maintain a fixed shape and typically include cushions. Hammock chairs are more compact, generally less expensive ($40-$150 vs. $200-$600), and easier to store. Egg chairs offer more structured support and a distinct mid-century modern aesthetic. For small spaces and budget-conscious buyers, hammock chairs are more practical. For statement pieces in larger rooms, egg chairs make bigger visual impact.

How do you prevent a hammock from flipping or tipping over?

Hammock flipping usually results from improper entry technique or incorrect hanging angle. To enter safely: approach from the side, sit in the center, then swing your legs up while keeping your weight centered. The hammock should hang at roughly 30 degrees from horizontal—too loose creates instability. Spreader-bar hammocks (rope style) are more prone to flipping than gathered-end fabric hammocks. If you’re experiencing frequent tipping, adjust the hanging height to create more tension, or switch to a Brazilian-style fabric hammock that naturally wraps around you.

Can renters install indoor hammocks without damaging walls or ceilings?

Yes, renters have several damage-free options. Freestanding hammock stands require no installation and leave no marks—they’re the most renter-friendly choice. For hammock chairs, some tension rod systems work between floor and ceiling without drilling, though weight capacity is limited (check manufacturer specs carefully). Door frame hammock mounts exist but are generally not recommended for safety reasons. If you have a supportive landlord, ceiling installation with proper patching upon move-out is possible, but get written permission first. The stand option offers the most flexibility and peace of mind.

How do you clean a hammock that’s too large for a washing machine?

For oversized hammocks, fill a bathtub with cold water and add mild detergent (about 1/4 cup). Submerge the hammock and gently agitate by hand, paying special attention to high-contact areas. Let soak for 15-20 minutes, then drain and refill with clean water to rinse—repeat until water runs clear and no soap remains. Gently squeeze out excess water (don’t wring, which can damage fibers). Hang to air dry completely, either on the hammock installation points or over a shower rod. For rope hammocks, you can also use a garden hose outdoors. Clean every 4-6 weeks with regular use, or when visibly soiled.