
Affordable Kitchen Decor at a Glance — Compare Live Prices
Our top picks compared side by side, with prices pulled live from Amazon:
Prices & availability accurate as of October 5, 2026 and may change. As an Amazon Associate, Inside Decors earns from qualifying purchases.
This article may contain affiliate links. We may earn a commission at no extra cost to you.
The kitchen is often called the heart of the home, and for good reason. It’s where meals are prepared, families gather, and memories are made. But creating a stylish and functional kitchen doesn’t have to come with a hefty price tag. In 2026, it’s all about smart choices, creative DIYs, and leveraging affordable finds to achieve a high-end look for less.
After personally transforming three rental kitchens over the past five years—each on budgets ranging from $200 to $800—I’ve learned that strategic updates deliver far more impact than scattered purchases. Whether you’re looking to refresh a tired space or add personality to a new one, these budget-friendly kitchen decor ideas will inspire you to create a kitchen that looks custom without the custom price tag.
Key Takeaways
- Paint delivers the highest ROI: A $50-100 paint project can completely transform your kitchen’s aesthetic
- Focus on visible hardware and fixtures: Swapping cabinet pulls and light fixtures costs $100-300 but creates an instant high-end look
- Layer affordable storage solutions: Open shelving, wall-mounted organizers, and drawer inserts ($50-150 total) eliminate clutter while adding style
- Peel-and-stick materials are game-changers: Backsplash tiles and countertop films ($40-200) offer dramatic updates without permanent commitment
- Lighting layering costs less than you think: Under-cabinet LED strips and strategic task lighting ($30-80) create ambiance and functionality
- Most impactful updates cost under $500 total: Strategic choices beat expensive renovations every time
1. Refresh with Paint: The Ultimate Budget Transformation

Never underestimate the power of a fresh coat of paint. It’s one of the most cost-effective ways to dramatically change the look and feel of your kitchen, typically costing $50-150 for a standard-sized kitchen when you DIY.
For 2026, trending kitchen colors include muted sage greens, warm terracotta, soft clay neutrals, and charcoal greys. If you’re hesitant about full-wall color, consider an accent wall behind open shelving or a bold color on a single feature wall. I painted my rental kitchen’s longest wall in Benjamin Moore’s “Aegean Teal” for $68 (two gallons), and it instantly elevated the entire space from builder-grade to boutique.
Cabinet Painting: Maximum Impact for $100-250
Painting existing cabinets delivers the most dramatic transformation. Here’s what I learned from painting three sets of cabinets:
Best practices:
– Use a degreaser (TSP substitute) before sanding—grease prevents paint adhesion
– Light sanding with 220-grit paper creates necessary texture
– Prime with a bonding primer like Zinsser B-I-N ($25/quart)
– Apply two coats of semi-gloss or satin cabinet paint ($35-45/quart)
– Budget 2-3 full days for a standard 10-cabinet kitchen
Color strategies:
– Two-tone cabinets: Paint lower cabinets in a darker shade (navy, forest green, charcoal) and keep uppers white or cream. This costs the same as single-color but looks custom. I used this approach in my 2024 kitchen refresh, painting only lower cabinets in “Hale Navy” while leaving uppers white—it took half the time and created a designer look.
– Island accent: If you have a kitchen island, paint it a contrasting color while leaving perimeter cabinets neutral
– Interior surprise: Paint the interior of glass-front cabinets or open shelving in an unexpected pop of color ($15 for a sample pot)
Realistic expectations: Cabinet painting is labor-intensive. If you have 20+ cabinet doors, consider painting just the most visible ones or hiring help for $300-600 (still far cheaper than $5,000-15,000 for new cabinets).
2. Smart Storage Solutions: Function Meets Style

Clutter can make even the most beautiful kitchen feel chaotic. I’ve found that investing $100-200 in strategic storage delivers both aesthetic and functional returns—you’ll actually enjoy cooking more when everything has a place.
Open Shelving: Airy and Accessible ($30-120)
Replacing one or two upper cabinets with open shelves creates visual breathing room and showcases your prettiest dishware. I installed two 36-inch floating shelves in my current kitchen for $45 total (wood from Home Depot, brackets from Amazon).
What works:
– Limit open shelving to 1-2 walls maximum—too much creates visual clutter
– Display items you actually use: everyday dishes, coffee mugs, attractive glassware
– Mix functional items with 2-3 decorative pieces (small plants, a vintage cutting board, a ceramic vase)
– Maintain consistent spacing: 15-18 inches between shelves works for most dishes
Budget options:
– IKEA LACK floating shelves: $15-25 each
– DIY reclaimed wood shelves with basic brackets: $20-40 per shelf
– Repurposed scaffold boards for industrial look: $30-50 per shelf
Wall-Mounted Organizers: Vertical Space Saviors ($25-80)
Utilizing vertical space keeps counters clear and essentials within reach. Here’s what actually works:
- Magnetic knife strips ($15-25): Safer than knife blocks, saves drawer space, and looks professional. Mount 6 inches above your primary prep area.
- Wall-mounted pot racks ($35-80): A wall-mounted pot rack frees up cabinet space and adds restaurant-kitchen aesthetic. Best for kitchens with at least 8 feet of wall space.
- Pegboard organizer walls ($30-60): Customizable and trendy. I installed a 2×4-foot pegboard section for $42 and use it for utensils, measuring cups, and small pots.
- Spice racks ($20-40): Wall-mounted or inside-cabinet-door racks keep spices visible and organized. The pull-down versions that mount inside upper cabinets are genius for small kitchens.
Drawer and Pantry Organization ($40-100)
Clear bins and drawer dividers might seem mundane, but they’re transformative. I spent $65 on drawer organizers and pantry containers, and it eliminated the “junk drawer chaos” that plagued my kitchen.
High-impact organizers:
– Bamboo drawer dividers for utensils: $15-25
– Clear stackable pantry bins: $30-50 for a set
– Pull-out cabinet organizers: $25-60 (the under-sink versions are particularly useful)
– Lazy Susans for corner cabinets: $12-20 each
3. Elevate with Hardware & Fixtures

Small details create big impact. Upgrading cabinet hardware and light fixtures is one of the most cost-effective ways to achieve a custom, high-end look, typically costing $100-300 total.
Cabinet Hardware: The 30-Minute Upgrade ($50-150)
I’ve replaced cabinet hardware in four kitchens, and it’s consistently the update that guests notice first. Budget $3-8 per pull/knob; a standard kitchen with 20-30 pieces costs $60-240.
2026 trending finishes:
– Matte black: Timeless, modern, hides fingerprints. A set of matte black cabinet pulls works with virtually any cabinet color.
– Brushed brass/gold: Warm and sophisticated, pairs beautifully with white, navy, or green cabinets
– Brushed nickel: Versatile and slightly warmer than chrome
– Mixed metals: Combining finishes (like brass pulls with black knobs) adds custom detail
Installation tip: Measure your existing hole spacing before buying. Standard pulls are 3″ or 3.75″ center-to-center. If you’re changing spacing, fill old holes with wood filler, sand, and touch up with paint.
Budget hack: Spray paint existing hardware with specialty metal paint ($8-12 per can). I transformed dated brass pulls to matte black for $10 total—they’ve held up perfectly for two years.
Light Fixtures: Instant Ambiance ($50-200)
Replacing one or two light fixtures dramatically updates your kitchen’s style. Focus on the most visible fixture first—usually a pendant over an island or the main ceiling fixture.
Affordable options:
– Pendant lights: $40-120 each. Hang 30-36 inches above countertops, 28-34 inches above islands.
– Flush or semi-flush mounts: $50-150. Choose fixtures with at least 60-watt equivalent LED output for adequate kitchen lighting.
– Track lighting: $60-180 for a complete system. Adjustable heads let you direct light where needed.
Style guidance: Match your fixture finish to your new hardware for a cohesive look. I installed a $78 matte black pendant over my island that perfectly complements my black cabinet pulls—the coordination makes the space feel intentionally designed.
4. Accessorize with Purpose: Decor That Works Hard
The best kitchen accessories serve dual purposes—they’re both functional and beautiful. I’ve learned to be selective: every visible item should either be used regularly or bring genuine joy.
Functional Display Items
Cutting boards and serving pieces ($20-60): Lean a beautiful wooden cutting board or marble serving board against your backsplash or display on open shelving. I keep three boards in rotation—a large walnut board ($35), a white marble board ($28), and a small bamboo board ($12)—and they add warmth and texture while being genuinely useful.
Attractive storage containers ($30-80): Decant pantry staples into matching glass or ceramic containers. This looks high-end and helps you track inventory. I use a set of glass kitchen canisters for flour, sugar, coffee, and pasta—they’re both decorative and functional.
Utensil holders ($15-35): Instead of hiding cooking utensils, display them in an attractive ceramic crock, vintage pitcher, or sleek metal holder near your stove. This keeps them accessible and adds a decorative touch.
Textiles: Easy Color and Pattern ($30-70)
Kitchen textiles are the easiest way to introduce color, pattern, and seasonal changes without commitment.
Strategic textile choices:
– Dish towels ($20-40 for 4-6): Choose a cohesive color palette. I rotate between two sets—neutral linen for everyday and patterned cotton for when I want more color.
– Kitchen rugs ($25-80): A washable kitchen rug adds comfort underfoot and defines zones. Choose machine-washable options in low-pile or flat-weave styles. Size matters: 2×3 feet for sink areas, 2.5×7 feet for galley kitchens.
– Window treatments ($20-60): Simple cafe curtains or a linen Roman shade softens the space. I made my own cafe curtains from $18 worth of fabric—they took 45 minutes and add crucial warmth.
Greenery: Life and Freshness ($15-50)
Plants bring energy to kitchens. I keep three types:
Functional herbs ($12-25): A small windowsill herb garden with basil, rosemary, and thyme costs $12-18 and provides fresh ingredients. Use matching terracotta pots ($8 for three) for a cohesive look.
Low-maintenance plants ($15-35): Pothos, snake plants, or ZZ plants thrive in various light conditions. I have a pothos in a hanging planter near my window—it’s grown 4 feet in a year and costs $16.
Faux options ($20-40): High-quality faux eucalyptus, olive branches, or succulents work beautifully if you lack natural light or simply want zero maintenance. The key is choosing realistic options—avoid obviously fake, overly shiny leaves.
5. DIY Backsplash & Countertop Updates
While full renovations might be out of budget, clever DIY solutions can transform these major surfaces for $100-300.
Peel-and-Stick Backsplash: Renter-Friendly Transformation ($40-150)
I’ve installed peel-and-stick backsplash in two kitchens, and the technology has improved dramatically. Modern versions look remarkably realistic and hold up well to kitchen conditions.
What I learned:
– Surface prep is critical: Clean thoroughly with degreaser, let dry completely, and ensure walls are smooth. I lightly sanded my textured walls first.
– Measure twice, order once: Calculate square footage and add 10% for waste. A standard 4-foot backsplash area (4 feet high x 8 feet wide) needs about 35 square feet of material.
– Installation time: Budget 3-4 hours for a standard backsplash area. Work slowly—repositioning is possible but easier within the first few minutes.
Style options for 2026:
– Classic white subway tile: $40-80 for standard kitchen
– Moroccan or geometric patterns: $60-120
– Marble or stone look: $70-150
– Herringbone or chevron patterns: $80-150
Durability reality: Quality peel-and-stick backsplash lasts 2-5 years with proper installation. I’m in year three with mine, and it still looks great. Avoid placing it directly behind stoves where extreme heat occurs.
Countertop Contact Paper: Temporary Luxury ($50-120)
I was skeptical about countertop contact paper until I tried it in a rental with dated laminate counters. The transformation was stunning, and it’s held up for 18 months.
Application process:
1. Clean and degrease counters thoroughly
2. Measure and cut paper 2 inches larger than needed
3. Use a spray bottle with soapy water to allow repositioning
4. Squeegee out bubbles working from center outward
5. Trim edges with a sharp utility knife
6. Seal edges with clear caulk for water resistance
Best uses:
– Covering dated laminate or tile counters
– Creating a cohesive look when you have mismatched surfaces
– Temporary solution while saving for permanent upgrades
Realistic expectations: This is a 1-3 year solution. Edges near sinks may lift over time despite sealing. Avoid cutting directly on the surface—use cutting boards. I spent $85 on marble-look contact paper for 25 square feet of counter, and while it requires some care, it completely transformed my kitchen’s aesthetic.
Painted Countertops: Bold and Budget-Friendly ($60-150)
Countertop paint kits (like Giani or Rust-Oleum) can transform laminate surfaces into faux granite or marble. I haven’t personally done this, but my sister completed her kitchen for $120, and it’s held up for two years.
Process overview:
– 2-3 day project requiring careful prep and multiple coats
– Works best on laminate; results vary on tile
– Requires sealing with epoxy topcoat for durability
– Expect to reapply topcoat every 1-2 years in high-use areas
Who this works for: Homeowners planning to stay 2-5 years who want a fresh look without renovation costs. Not ideal for rentals (too permanent) or for those planning major renovations soon.
6. Lighting Layering: Create Ambiance on a Budget
Good lighting transforms kitchen functionality and mood. The goal is layering three types: ambient (overall illumination), task (work area lighting), and accent (decorative/mood lighting). You can achieve this for $60-200 total.
Under-Cabinet Lighting: The Game-Changer ($30-100)
Under-cabinet lighting was the single most impactful upgrade in my current kitchen. I installed plug-in LED strip lights for $45, and they’ve transformed both functionality and ambiance.
Options comparison:
| Type | Cost | Installation | Brightness | Best For |
|---|---|---|---|---|
| Battery-operated puck lights | $20-40 | Stick-on, 5 min | Low-medium | Accent lighting, minimal use |
| Plug-in LED strips | $30-60 | Adhesive + plug, 30 min | Medium-high | Renters, easy installation |
| Hardwired LED strips | $60-150 | Requires electrical work | High | Permanent installation, homeowners |
| Smart LED strips | $45-100 | Adhesive + plug, 30 min | Adjustable | Color-changing, app control |
Top Affordable Kitchen Decor Picks — Live Prices
Hand-checked against Amazon right now, best current deals first:
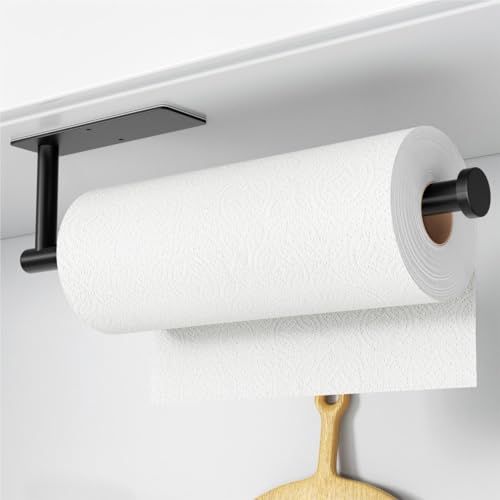
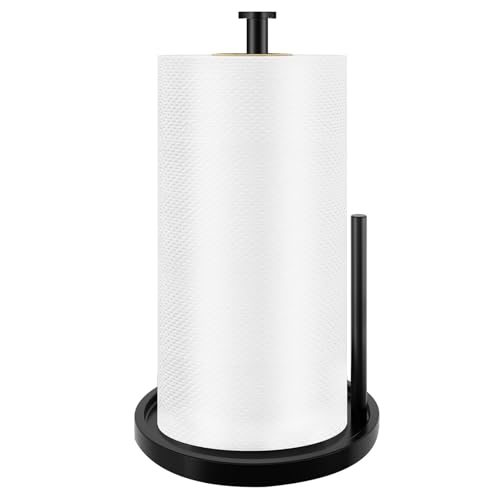
Prices & availability accurate as of October 5, 2026 and may change. As an Amazon Associate, Inside Decors earns from qualifying purchases.
Installation tips:
– Mount strips toward the front of cabinets to minimize shadows
– Choose warm white (2700-3000K) for cozy ambiance or bright white (4000K) for task lighting
– Connect to a smart plug ($8-15) for voice control or scheduling
I use warm white strips connected to a smart plug—they turn on automatically at sunset and create beautiful ambient lighting for evening cooking.
Task Lighting: Targeted Illumination ($20-80)
Strategic task lighting improves functionality in specific work zones.
Effective solutions:
– Adjustable desk lamps ($25-60): A simple adjustable desk lamp on a counter provides focused light for recipe reading or detailed prep work
– Pendant lights over islands ($40-120): Covered in the fixtures section, these provide both task and ambient lighting
– Clamp lights ($15-30): Temporary but effective for illuminating dark corners or specific work areas
Accent Lighting: Mood and Warmth ($15-50)
Accent lighting adds personality and warmth, especially in the evenings.
Budget-friendly options:
– String lights ($12-25): Battery-operated warm white string lights inside glass-front cabinets or along open shelving create a cozy glow
– LED candles ($15-30): Flameless candles on counters or shelves add warmth without fire risk
– Cabinet interior lighting ($20-40): Small battery-operated puck lights inside glass-front cabinets highlight dishware and create depth
My setup: I use under-cabinet LED strips (task + ambient), a pendant over my island (task + decorative), and string lights inside one glass-front cabinet (accent). Total cost: $132. The layered lighting makes my kitchen feel custom and high-end.
Budget Allocation: Where to Spend Your Money
Based on transforming multiple kitchens, here’s how I recommend allocating a $500 budget for maximum impact:
| Category | Budget | Impact Level | Priority |
|---|---|---|---|
| Paint (walls or cabinets) | $80-150 | Very High | 1 |
| Cabinet hardware | $60-100 | High | 2 |
| Lighting (under-cabinet + fixture) | $80-120 | High | 3 |
| Peel-and-stick backsplash | $50-100 | Medium-High | 4 |
| Storage & organization | $50-80 | Medium | 5 |
| Textiles & accessories | $40-70 | Medium | 6 |
| Plants & greenery | $20-40 | Low-Medium | 7 |
Strategic approach: Start with paint and hardware (highest impact, $140-250 total). These two updates alone will transform your kitchen. Then add lighting ($80-120). If budget remains, tackle backsplash or storage based on your biggest pain point.
Phased approach: If $500 feels overwhelming, break it into phases:
– Phase 1 ($150): Paint + hardware
– Phase 2 ($100): Under-cabinet lighting + one new fixture
– Phase 3 ($100): Peel-and-stick backsplash
– Phase 4 ($150): Storage, textiles, and accessories
This approach spreads costs over 3-6 months while delivering continuous improvements.
Styling Principles: Making It All Work Together
The difference between “decorated” and “designed” comes down to cohesion. Here’s what I’ve learned about creating a pulled-together look:
Choose a Consistent Color Palette
Select 2-3 main colors plus one accent. My current kitchen uses white (cabinets, walls), warm wood tones (cutting boards, shelves), matte black (hardware, fixtures), and sage green (textiles, plants) as an accent. This consistency makes even budget pieces look intentional.
Mix High and Low
Combine a few higher-quality investment pieces with budget finds. I spent $120 on a beautiful pendant light but $15 on dish towels. The quality piece elevates everything around it.
Edit Ruthlessly
More isn’t better. I display only items I use regularly or genuinely love. My counters hold a utensil crock, a cutting board, and a small plant—that’s it. Clear counters make any kitchen look more expensive.
Create Vignettes
Group items in odd numbers (3 or 5) for visual appeal. On my open shelf, I have three white bowls, a small plant, and two cookbooks—the asymmetry feels natural and curated.
Maintain Consistent Finishes
Match your hardware finish to your light fixtures and faucet if possible. This coordination signals intentional design. In my kitchen, everything metal is matte black—it creates cohesion even though pieces came from different sources.
Learning from Other Spaces
The principles that work for budget kitchen updates apply throughout your home. If you’re also tackling other rooms, the same strategic approach—focusing on paint, lighting, and thoughtful accessories—delivers results. I used similar techniques when I decorated my bedroom on a budget, prioritizing high-impact changes over scattered purchases.
For those working with compact spaces, many of these storage and styling strategies overlap with small living room decorating ideas—the key is always maximizing vertical space and choosing multi-functional pieces.
Common Mistakes to Avoid
After multiple kitchen updates and observing countless others, here are the pitfalls to avoid:
Buying before planning: I once bought $80 worth of accessories before establishing a color scheme. Half didn’t work and sat unused. Always establish your vision first.
Skipping surface prep: Paint and peel-and-stick materials fail without proper cleaning and prep. The extra hour spent degreasing and sanding saves you from redoing work.
Choosing trendy over timeless: That millennial pink might feel fresh now, but will you love it in two years? Stick with classic bases (white, grey, wood tones) and add trends through easily changeable textiles and accessories.
Ignoring scale: Oversized pendants in small kitchens or tiny hardware on large cabinets looks off. Measure carefully and consider proportion.
Forgetting functionality: That beautiful open shelving won’t work if you have mismatched, chipped dishes. Be honest about what you’ll actually display.
Underestimating installation time: Most DIY projects take 2-3 times longer than expected. Don’t start painting cabinets the day before hosting dinner.
Your Stylish Kitchen Awaits in 2026
Transforming your kitchen doesn’t require a massive budget or a complete overhaul. By focusing on smart updates like fresh paint ($50-150), clever storage ($50-150), updated hardware and fixtures ($100-300), strategic lighting ($60-200), and purposeful accessories ($40-100), you can create a kitchen that feels custom, stylish, and uniquely yours for $300-900 total.
The key is strategic thinking: identify your kitchen’s biggest weakness (outdated cabinets? poor lighting? cluttered counters?) and address that first. Then layer additional updates as budget allows. Every kitchen I’ve transformed started with one high-impact change that motivated the rest.
Remember, the goal isn’t perfection—it’s creating a space that functions well and brings you joy every time you walk in. Start with one project this weekend. Paint that accent wall. Install those under-cabinet lights. Swap out that dated hardware. Small changes compound into dramatic transformations.
Ready to get started? Choose your highest-impact project, set aside a weekend, and begin creating the kitchen you’ve been dreaming about—without the renovation price tag.
Frequently Asked Questions
What’s the cheapest way to update a kitchen?
Paint delivers the highest return on investment for the lowest cost. A fresh coat of paint on walls costs $50-100 for a standard kitchen and can completely transform the space. If you’re willing to invest more time, painting existing cabinets ($100-250 in materials) creates the most dramatic change. Swapping cabinet hardware is the second most cost-effective update at $50-150 total.
How can I make my kitchen look expensive on a budget?
Focus on three key areas: (1) Update all visible hardware to matching finishes—consistency signals intentional design, (2) Add under-cabinet lighting for $30-60—it creates ambiance and makes spaces feel custom, and (3) Declutter counters completely—clear surfaces make any kitchen look more expensive. These three changes cost $100-250 total but deliver a high-end appearance.
Are peel-and-stick backsplashes worth it?
Yes, especially for renters or those wanting a temporary update. Modern peel-and-stick backsplash materials look remarkably realistic and last 2-5 years when properly installed. They cost $40-150 for a standard backsplash area versus $800-2,000 for traditional tile installation. The key is thorough surface prep—clean, degrease, and ensure walls are smooth before application. Avoid placing them directly behind stoves where extreme heat occurs.
How much does it cost to update a kitchen on a budget?
A meaningful kitchen update costs $300-900 depending on priorities. A basic refresh (paint, hardware, lighting) runs $200-400. A more comprehensive update (adding backsplash, storage solutions, and accessories) costs $500-900. This is 90-95% less expensive than a full kitchen renovation ($15,000-40,000) while still delivering significant visual impact.
What kitchen colors are trending in 2026?
Warm, earthy tones dominate 2026 kitchen trends: muted sage greens, soft terracotta, warm clay neutrals, and charcoal greys. Two-tone cabinets remain popular—pairing white or cream upper cabinets with darker lowers in navy, forest green, or charcoal. These colors feel timeless rather than trendy, ensuring your update won’t feel dated in 2-3 years.
Can you paint laminate countertops?
Yes, specialty countertop paint kits ($60-150) can transform laminate surfaces into faux granite or marble finishes. The process requires 2-3 days of careful prep, multiple coats, and sealing with epoxy topcoat. Results last 2-4 years with proper care, though high-use areas near sinks may require topcoat reapplication every 1-2 years. This works best for homeowners planning to stay 2-5 years who want a fresh look without renovation costs. It’s too permanent for rentals and unnecessary if you’re planning major renovations soon.