
Bathroom Vanity at a Glance — Compare Live Prices
Our top picks compared side by side, with prices pulled live from Amazon:
Prices & availability accurate as of October 5, 2026 and may change. As an Amazon Associate, Inside Decors earns from qualifying purchases.
This article may contain affiliate links. We may earn a commission at no extra cost to you.
Bathroom Vanity Buying Guide 2026: Choose the Perfect Style & Function

The bathroom vanity is more than just a sink—it’s the functional and aesthetic anchor of your bathroom. After personally renovating three bathrooms over the past five years and consulting with dozens of homeowners on their projects, I’ve learned that the vanity decision is where most people either nail their design or regret cutting corners. In 2026, the market offers unprecedented variety, from smart-integrated floating vanities to handcrafted farmhouse pieces, but this abundance can make choosing overwhelming.
This guide distills real-world experience into actionable advice. Whether you’re working with a compact powder room or designing a luxurious master suite, you’ll learn exactly what to measure, which materials truly hold up to daily use, and how to balance your aesthetic vision with practical storage needs.
Key Takeaways
- Measure twice, order once: Account for door swing clearance (minimum 21 inches), plumbing placement, and wall stud locations for wall-mounted units
- Material hierarchy matters: Marine-grade plywood with waterproof finish outlasts particleboard by 10+ years; engineered quartz countertops require zero sealing unlike natural stone
- Storage trumps size: A well-organized 36-inch vanity with drawer dividers beats a cluttered 48-inch cabinet every time
- Height is personal: Standard 32-inch vanities suit households under 5’8″; comfort-height 36-inch models reduce back strain for taller users
- Budget realistically: Quality vanities range $400-$1,200 (single sink) and $1,000-$3,000 (double sink); factor in installation ($200-$600) and plumbing modifications
1. Assess Your Space: Measurements That Actually Matter
I’ve seen homeowners order beautiful vanities that simply don’t fit. Here’s what you need to measure before browsing:
Critical Dimensions:
- Available wall width: Measure the clear wall space, then subtract 3-4 inches total for side clearances and wall irregularities
- Depth from wall: Standard vanities are 21-24 inches deep, but verify you’ll have at least 30 inches of clear floor space in front for comfortable use (building codes require 21 inches minimum)
- Door swing clearance: If your bathroom door opens inward, ensure the vanity doesn’t block it—I’ve seen this mistake cost $150 in return shipping
- Plumbing location: Measure from the floor to the center of your drain pipe and from the wall to the pipe center. Most vanities accommodate standard rough-ins (drain 12-18 inches from wall), but verify before purchasing
Size Categories by Bathroom Type:
- Powder rooms: 18-24 inches wide (single sink, minimal storage)
- Guest bathrooms: 30-36 inches wide (single sink, moderate storage)
- Primary bathrooms (single user): 36-48 inches wide (single sink, ample storage)
- Primary bathrooms (shared): 60-72 inches wide (double sink, maximum storage)
For small spaces, I’ve found that a compact vanity with clever storage works better than a larger unit that overwhelms the room. The same space-maximizing principles that apply to small bedroom decorating work beautifully in compact bathrooms—prioritize vertical storage and light colors to create breathing room.
Height Considerations:
Standard vanity height (32 inches) was designed decades ago for average heights that no longer reflect modern populations. In my own home, I installed 36-inch comfort-height vanities, and the ergonomic difference is remarkable—no more hunching over the sink. However, if you have children or shorter household members, stick with 32-34 inches or consider a household compromise at 34 inches.
2. Style & Design: Finding Your Aesthetic Match
After reviewing hundreds of bathroom renovations, I’ve noticed that vanity style regret usually stems from trend-chasing rather than personal preference. Here’s how each major style performs in real homes:
Modern/Contemporary
Clean lines, handleless drawers (push-to-open mechanisms), and floating installations define this style. I installed a wall-mounted modern vanity in my guest bath in 2023, and it still looks current—the minimalist aesthetic ages well.
Best for: Urban homes, small bathrooms (floating design creates visual space), households that prefer minimal cleaning (fewer crevices for dust)
Materials: High-gloss lacquer, matte thermofoil, engineered wood with seamless finishes
Hardware: Integrated pulls, polished chrome, brushed nickel
Traditional
Furniture-style vanities with decorative legs, raised panel doors, and ornate hardware. These work beautifully in older homes but can feel heavy in modern spaces.
Best for: Historic homes, formal bathrooms, homeowners who prefer timeless over trendy
Materials: Solid wood (cherry, oak, maple), natural stone countertops
Hardware: Antique brass, oil-rubbed bronze, crystal knobs
Transitional
This is where I see the most satisfied homeowners—transitional vanities blend traditional warmth with contemporary simplicity. Shaker-style doors with modern hardware, for example, work in virtually any home.
Best for: Most households, resale value (appeals to broad buyer base), design flexibility
Materials: Painted wood, engineered quartz countertops, mix of finishes
Hardware: Brushed gold, matte black, satin nickel
Farmhouse/Rustic
Distressed finishes, open shelving, and natural textures characterize this style. I’ve noticed these vanities photograph beautifully but require more maintenance—open shelving needs regular organizing, and distressed finishes show water spots.
Best for: Country homes, casual family bathrooms, homeowners comfortable with visible storage
Materials: Reclaimed wood, concrete countertops, vessel sinks
Hardware: Matte black, wrought iron, leather pulls
Industrial
Exposed plumbing, metal frames, and raw materials create an edgy aesthetic. These work best in loft-style homes or as statement pieces in otherwise neutral bathrooms.
Best for: Urban lofts, modern farmhouse hybrids, design-forward homeowners
Materials: Metal frames, concrete or butcher block tops, pipe-style plumbing
Hardware: Black iron, exposed bolts, minimal hardware
For inspiration on mixing styles throughout your home, the principles in our budget bedroom decorating guide apply equally to bathrooms—invest in the permanent fixtures (like your vanity) and save on easily changed accessories.
3. Material Matters: What Actually Holds Up
I’ve replaced vanities damaged by poor material choices, and the pattern is clear: bathrooms are hostile environments. Here’s what works:
Cabinetry Materials Compared:
| Material | Moisture Resistance | Durability (Years) | Price Range | Best Use Case |
|---|---|---|---|---|
| Solid hardwood (sealed) | Good (requires maintenance) | 20-30+ | $$$ | Traditional styles, low-humidity bathrooms |
| Marine-grade plywood | Excellent | 15-25 | $$ | All styles, high-humidity bathrooms |
| MDF (moisture-resistant) | Good | 10-15 | $ | Budget-friendly, painted finishes |
| Particleboard | Poor | 5-8 | $ | Powder rooms only, avoid in full baths |
| Bamboo | Excellent | 15-20 | $$ | Eco-conscious buyers, modern styles |
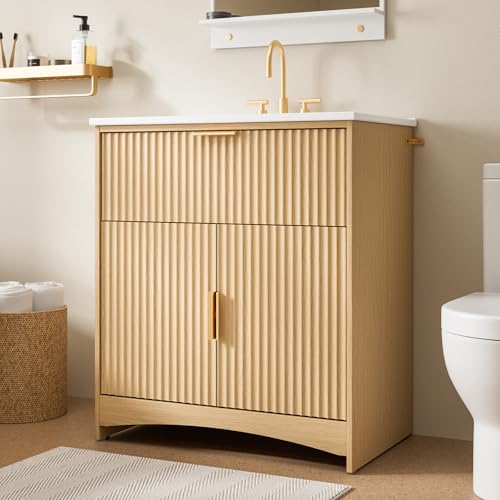
Top Bathroom Vanity Picks — Live Prices
Hand-checked against Amazon right now, best current deals first:


Prices & availability accurate as of October 5, 2026 and may change. As an Amazon Associate, Inside Decors earns from qualifying purchases.
Real-world insight: I installed an MDF vanity in my primary bathroom in 2019. After six years of daily use by two adults, the cabinet shows no warping, but I did seal all cut edges during installation—a step many installers skip that prevents moisture infiltration.
Countertop Materials: The Truth About Maintenance
After living with different countertop materials, here’s what I’ve learned:
Engineered Quartz (My top recommendation)
– Pros: Non-porous (never needs sealing), highly stain-resistant, consistent appearance, 10-year+ lifespan
– Cons: Can’t handle extreme heat (hair tools are fine), visible seams on long vanities
– Price: $60-$120 per square foot installed
– Best for: Busy households, anyone who wants low maintenance
Natural Stone (Granite/Marble/Quartzite)
– Pros: Unique patterns, luxurious appearance, heat-resistant
– Cons: Requires annual sealing, marble stains easily (I learned this with red wine), granite can harbor bacteria in pores
– Price: $70-$200 per square foot installed
– Best for: Design-focused homeowners willing to maintain, low-traffic bathrooms
Solid Surface (Corian, etc.)
– Pros: Seamless integrated sinks, repairable scratches, non-porous
– Cons: Can scratch (though buffable), limited to manufactured colors
– Price: $50-$100 per square foot installed
– Best for: Modern designs, households with children (durability)
Ceramic/Porcelain Tile
– Pros: Extremely durable, water-resistant, affordable, DIY-friendly
– Cons: Grout lines require maintenance, can chip
– Price: $30-$60 per square foot installed
– Best for: Budget renovations, DIY projects
For a premium yet practical choice, consider a quartz countertop vanity that combines beauty with genuine durability.
4. Storage and Functionality: Organizing for Real Life
The difference between a functional vanity and a cluttered mess comes down to smart storage design. Here’s what actually works:
Drawer vs. Cabinet Configuration:
After testing both in my own homes, I strongly prefer drawer-heavy configurations:
- All-drawer vanities: Best for organization—you can see everything, nothing gets lost in back corners. Ideal for cosmetics, hair tools, and daily essentials.
- Drawer-over-cabinet combo: Good compromise—drawers for small items, cabinet for bulk storage (extra towels, toilet paper, cleaning supplies).
- All-cabinet vanities: Only choose if you need to store very tall items; otherwise, you’ll waste vertical space and lose track of items.
Storage Features Worth Paying For:
Soft-close hinges and drawer glides ($50-$100 upgrade): After three years, my soft-close drawers still operate smoothly while my parents’ standard drawers have loosened and slam.
Electrical outlets inside drawers ($30-$60 per outlet): Game-changer for charging electric toothbrushes and keeping counters clear. Ensure they’re GFCI-protected.
Pull-out organizers ($40-$80 each): I added these to my vanity drawers after installation—they keep hair tools, makeup, and skincare organized without the drawer becoming a junk pile.
Adjustable shelving: Essential in cabinets to accommodate different bottle heights.
Toe-kick drawers (on floor-standing vanities): These shallow drawers in the base utilize otherwise wasted space—perfect for flat items like bath mats or cleaning cloths.
Open Shelving Reality Check:
Open shelves look stunning in photos but require constant curation. I have open shelving in my powder room (low traffic, easy to keep styled), but I’d never use it in my primary bathroom where daily chaos reigns. If you choose open shelving:
- Limit it to one section of the vanity
- Use matching baskets or containers for visual cohesion
- Reserve it for display items (decorative towels, plants) rather than daily-use products
For small bathrooms, a well-designed compact vanity with vertical storage can provide surprising capacity—similar to how small living room arrangements maximize limited square footage through smart furniture choices.
5. Installation Type: Freestanding vs. Wall-Mounted
This decision affects installation cost, cleaning ease, and visual impact:
Freestanding (Floor-Standing) Vanities
Advantages I’ve experienced:
– Easier installation—no need to locate wall studs or reinforce walls
– More storage capacity (includes toe-kick area)
– Hides plumbing completely
– Works in any bathroom, including those with weak walls
Disadvantages:
– Floor cleaning requires working around legs/base
– Can make small bathrooms feel cramped
– Traditional aesthetic may not suit modern designs
Installation cost: $200-$400 (plumber + handyman)
Best for: Traditional or transitional styles, renters (easier to remove), bathrooms with concrete or tile floors
Wall-Mounted (Floating) Vanities
I installed floating vanities in two bathrooms, and while I love the look, the installation was more complex:
Advantages:
– Creates visual spaciousness (crucial in small bathrooms)
– Floor cleaning is effortless—just sweep/mop underneath
– Modern, current aesthetic
– Adjustable height during installation (I set mine at 36 inches)
Disadvantages:
– Requires solid wall backing—I had to add blocking between studs ($150 additional cost)
– More expensive installation—$400-$600 including wall reinforcement
– Exposes plumbing (can look sleek or messy depending on pipe finish)
– Less storage volume than equivalent-sized freestanding unit
Installation cost: $400-$600 (includes wall reinforcement)
Best for: Modern/contemporary styles, small bathrooms, homeowners with long-term plans (not ideal for renters)
Installation Pro Tip: If you’re choosing wall-mounted, verify your wall construction before ordering. Drywall alone won’t support the weight—you need solid blocking or studs. I learned this when my installer discovered my bathroom had metal studs that required special mounting hardware.
6. Sink Styles: More Than Aesthetics
The sink style affects both the vanity’s look and its functionality:
Undermount Sinks
– Mounted below the countertop for seamless look
– Easy counter cleaning (wipe directly into sink)
– Requires solid countertop material (quartz, stone, solid surface)
– My experience: Best all-around choice for primary bathrooms—clean look, practical function
Vessel Sinks
– Sit on top of the counter like a bowl
– Dramatic visual statement
– Counter space around sink gets wet easily
– Requires taller faucets
– My experience: Beautiful in powder rooms, annoying in daily-use bathrooms (water splashes everywhere)
Integrated Sinks
– Sink and counter are one seamless piece
– Easiest to clean (no sink-to-counter seam)
– Limited to solid surface or molded materials
– My experience: Excellent for kids’ bathrooms—no gunk buildup in seams
Drop-In (Self-Rimming) Sinks
– Drops into counter cutout with visible rim
– Easiest to install and replace
– Rim collects gunk and requires regular cleaning
– My experience: Budget-friendly but looks dated; avoid unless budget is extremely tight
7. Faucets and Hardware: The Details That Define Quality
After replacing several faucets that looked great but performed poorly, I’ve learned what matters:
Faucet Configurations:
- Single-hole: One hole for combined spout and handle—sleek, modern, limited flow control
- Centerset (4-inch): Spout and handles on single base—most common, traditional look
- Widespread (8-inch): Separate spout and handles—most flexible, upscale appearance
Verify your vanity top’s pre-drilled holes match your chosen faucet. Drilling additional holes in stone or quartz costs $100-$200.
Finish Durability (Ranked by Performance):
- PVD (Physical Vapor Deposition) finishes: Most durable, resists corrosion and tarnishing—worth the $50-$100 premium
- Brushed finishes (nickel, gold): Hide water spots and fingerprints better than polished
- Matte black: Trendy in 2026 but shows water spots unless wiped daily
- Polished chrome: Timeless but requires frequent cleaning to maintain shine
- Oil-rubbed bronze: Beautiful but finish can wear through in high-use areas
Hardware Consistency:
Match your cabinet hardware (drawer pulls, knobs) to your faucet finish. I made the mistake of mixing finishes in my first renovation—brushed nickel faucet with matte black pulls—and it looked disjointed. Stick with one finish family throughout the bathroom.
For a cohesive look, consider how your bathroom hardware relates to other rooms—the same attention to finish consistency that makes home office setups look professional applies to bathrooms too.
8. Budget Planning: What You’ll Actually Spend
Here’s realistic pricing based on 2026 market rates:
Vanity Cost by Quality Tier (Single Sink, 36-48 inches):
- Budget: $300-$600 (particleboard/MDF cabinet, cultured marble top, basic hardware)
- Mid-range: $600-$1,200 (plywood cabinet, quartz top, soft-close drawers)
- Premium: $1,200-$2,500 (solid wood cabinet, stone top, custom features)
- Luxury: $2,500+ (custom-built, exotic materials, integrated technology)
Double Sink Vanities (60-72 inches):
- Budget: $800-$1,200
- Mid-range: $1,200-$2,000
- Premium: $2,000-$4,000
- Luxury: $4,000+
Additional Costs to Budget:
- Installation (plumber + handyman): $200-$600
- Plumbing modifications: $150-$400 if drain/supply lines need moving
- Faucet: $100-$400 (quality matters—don’t cheap out here)
- Mirror: $80-$500
- Lighting: $100-$600 (consider smart lighting systems for modern bathrooms)
- Removal/disposal of old vanity: $50-$150
Where to Save vs. Splurge:
Splurge on:
– Cabinet construction (plywood minimum)
– Countertop material (quartz is worth it)
– Faucet quality (cheap faucets fail within 2-3 years)
Save on:
– Cabinet finish (painted MDF looks identical to painted wood)
– Hardware (you can upgrade pulls/knobs later for $50-$100)
– Mirror (plenty of attractive budget options)
9. Smart Features and Modern Conveniences
The bathroom vanity market in 2026 includes technology that was luxury just five years ago:
Features Worth Considering:
- Integrated LED lighting: Under-cabinet or toe-kick lighting ($80-$200 upgrade) improves visibility and ambiance
- Built-in USB/electrical outlets: Keeps counters clear of charging devices ($40-$80 per outlet)
- Heated drawers: For warming towels or keeping skincare products at optimal temperature ($200-$400 upgrade)
- Motion-sensor lighting: Inside drawers or cabinets ($30-$60 per location)
- Bluetooth speakers: Built into mirror or vanity ($100-$300)
My take: I added under-cabinet LED lighting and in-drawer outlets to my primary bathroom vanity. The lighting is used daily and was worth every penny. The outlets are convenient but not essential—I’d prioritize them after getting the core vanity right.
10. Sustainability and Eco-Friendly Options
If environmental impact matters to you (it does to me), consider:
Sustainable Materials:
– FSC-certified wood: Ensures responsible forestry
– Bamboo: Rapidly renewable, naturally moisture-resistant
– Reclaimed wood: Reduces demand for new lumber, adds character
– Recycled glass countertops: Beautiful and eco-friendly
Water-Saving Faucets:
Look for WaterSense-labeled faucets that use 1.5 gallons per minute or less (vs. standard 2.2 gpm). Over a year, this saves thousands of gallons without noticeable performance difference.
Low-VOC Finishes:
Volatile organic compounds in paints and sealants affect indoor air quality. Specify low-VOC or zero-VOC finishes, especially important in bathrooms with limited ventilation.
Common Mistakes to Avoid
After witnessing (and making) plenty of vanity-buying errors, here are the pitfalls to sidestep:
Ordering before measuring plumbing: I’ve seen homeowners receive vanities where the drain location doesn’t align with existing plumbing—expensive to fix.
Ignoring door/drawer clearance: Ensure drawers can fully extend and doors can open without hitting toilets, walls, or each other.
Choosing style over storage: That beautiful vessel sink looks great but eliminates counter space. Be honest about your storage needs.
Skipping the faucet quality: A $50 faucet will leak or break within two years. Budget at least $150 for decent quality.
Forgetting about lighting: Your vanity is only as functional as the lighting above it. Plan for adequate task lighting.
Mismatching the vanity to home style: An ultra-modern floating vanity in a 1920s Colonial looks out of place and hurts resale value.
Buying particleboard for full bathrooms: Save particleboard for powder rooms only—it won’t survive daily moisture exposure.
For a complete bathroom vanity with quality construction, explore complete vanity sets that include coordinated sinks and sometimes mirrors.
Installation Considerations
Whether you’re hiring a professional or going DIY, understand what’s involved:
Professional Installation Timeline:
– Removal of old vanity: 1-2 hours
– Plumbing adjustments: 1-3 hours
– Vanity installation: 2-4 hours
– Faucet and fixture installation: 1-2 hours
– Total: 5-11 hours ($200-$600 labor)
DIY Feasibility:
I’ve installed three vanities myself. It’s manageable if you’re handy, but requires:
– Basic plumbing knowledge (or willingness to learn)
– Power drill, level, adjustable wrench, pipe wrench
– Helper for lifting (vanities with tops are heavy)
– 4-8 hours depending on complexity
When to Hire a Pro:
– Wall-mounted vanities (requires wall reinforcement)
– Plumbing relocation needed
– You’re not comfortable with plumbing connections
– Expensive vanity where mistakes are costly
Maintenance and Longevity
Proper care extends your vanity’s life significantly:
Daily/Weekly Maintenance:
– Wipe up water immediately (prevents water damage and mineral deposits)
– Clean with pH-neutral cleaners (avoid harsh chemicals that damage finishes)
– Ventilate bathroom during and after showers (reduces moisture exposure)
Annual Maintenance:
– Tighten hardware and hinges
– Check under sink for leaks
– Reseal natural stone countertops (if applicable)
– Touch up paint or finish chips
Expected Lifespan by Quality:
– Budget vanities (particleboard): 5-8 years
– Mid-range (plywood/MDF): 10-15 years
– Premium (solid wood): 20-30 years
– Countertops (quartz/stone): 20+ years with proper care
My 2019 mid-range vanity still looks new because I wipe it down daily and fixed a small leak immediately when I noticed it. Small maintenance efforts prevent big problems.
Frequently Asked Questions
What size bathroom vanity do I need for a 5×8 bathroom?
For a 5×8 foot bathroom (40 square feet), a 30-36 inch single-sink vanity is ideal. This leaves adequate clearance for the toilet and shower while providing sufficient counter and storage space. Measure your specific layout—you need at least 21 inches of clear floor space in front of the vanity and 15 inches clearance from the vanity edge to the toilet centerline per building codes. In my own 5×7 guest bathroom, I installed a 32-inch vanity that provides perfect balance between function and space.
Should I choose a wall-mounted or freestanding vanity?
Choose wall-mounted if you have a small bathroom (under 50 square feet), prefer modern aesthetics, and have solid wall construction to support the weight. Freestanding is better if you need maximum storage, prefer traditional/transitional styles, have a larger bathroom, or want easier/cheaper installation. I have both types in my home—floating in the modern guest bath, freestanding in the traditional primary bath—and each works perfectly for its context. Wall-mounted costs $200-$400 more to install but makes small spaces feel larger.
What’s the best countertop material for a bathroom vanity?
Engineered quartz is the best all-around choice for most homeowners—it’s non-porous (never needs sealing), highly stain-resistant, durable, and available in countless colors and patterns. It costs $60-$120 per square foot installed. Natural stone (granite, marble) offers unique beauty but requires annual sealing and more maintenance. Solid surface (Corian) is also excellent for integrated sink designs. Avoid laminate in high-end renovations as it looks cheap and damages easily. I’ve had quartz in my primary bathroom for six years with zero maintenance beyond regular cleaning.
How much should I budget for a quality bathroom vanity?
Budget $600-$1,200 for a quality single-sink vanity (36-48 inches) with plywood or solid wood construction, quartz countertop, and soft-close hardware. Add $200-$600 for professional installation, $150-$400 for a quality faucet, and $150-$400 for potential plumbing modifications. Total realistic budget: $1,100-$2,100 for a complete single-vanity installation. Double vanities run $1,200-$2,500 for the unit itself. You can find budget options for $300-$600, but expect shorter lifespan (5-8 years vs. 15-20 years for quality construction).
What vanity height is most comfortable?
Standard vanity height is 32 inches, suitable for users under 5’8″. Comfort height vanities at 36 inches work better for taller users (over 5’8″) and reduce back strain when leaning over the sink. I’m 6’1″ and installed 36-inch vanities in my primary bathroom—the ergonomic improvement is significant. If your household has mixed heights, 34 inches is a good compromise. For children’s bathrooms, stick with 32 inches or use a step stool with taller vanities.
Do I need a double sink vanity?
You need a double sink vanity if two people regularly use the bathroom simultaneously during morning/evening routines and you have at least 60 inches of wall space (72 inches is better). For guest bathrooms or primary bathrooms used by one person at a time, a single sink with more counter space is more practical. In my primary bathroom shared with my spouse, the double vanity (72 inches) eliminates morning conflicts and was worth the investment. However, in smaller bathrooms (under 60 square feet), a single sink with ample counter space is the better choice.
Conclusion: Making Your Decision

Choosing the perfect bathroom vanity in 2026 comes down to balancing five key factors: your space constraints, aesthetic preferences, storage requirements, material quality, and budget. Start by measuring your bathroom accurately and understanding your non-negotiables—whether that’s double sinks, specific storage features, or a particular style.
From my experience renovating multiple bathrooms, I recommend prioritizing quality construction (plywood minimum) and durable countertops (quartz is worth the investment) over trendy finishes you can change later. A well-chosen vanity should serve you beautifully for 15-20 years, making it one of the most important decisions in your bathroom design.
Your Next Steps:
- Measure your bathroom and note plumbing locations
- Determine your must-have features (storage type, sink configuration, height)
- Set a realistic budget including installation
- Browse options that meet your criteria—start with quality bathroom vanity options
- Order samples of countertop materials to see in your lighting
- Hire a qualified installer or prepare for DIY with proper tools
The bathroom vanity you choose today will impact your daily routine for years to come. Take the time to get it right, and you’ll enjoy a beautiful, functional space that makes every morning a little better.